 As the world's most advanced inspection crawler, ROVVER X captures digital video and images, and lets you classify and measure defects. But if you're not organizing, analyzing and sharing that data, you're not realizing the full potential of your investment.
Industry-leading WinCan VX software comes standard with every new ROVVER X system, giving you the power to database your inspections, deliver detailed reports, share projects with distributable viewer software, visualize your data on GIS maps, and achieve PACP certification.
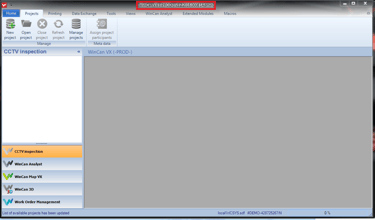
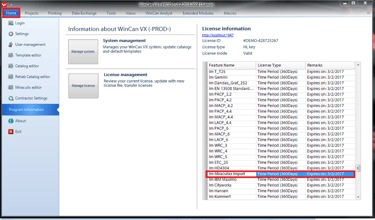
Learn how to import inspection data from your ROVVER X pendant to WinCan VX using this step-by-step guide.
|
|
|
|
|
|
|
|
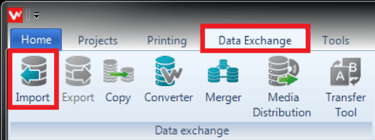
First, select the Data Exchange Tab, then click the Import button. This will open the WinCan VX Data Exchange Wizard. |
|
|
|
|
|
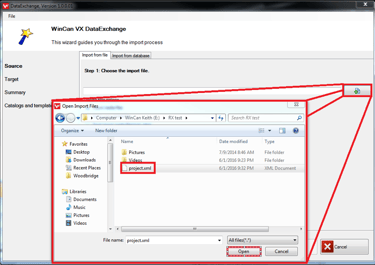
Browse to the project that was created on the ROVVER X controller. Then select the project.xml file as shown in the image below. After you have selected the file, click OPEN. |
|
|
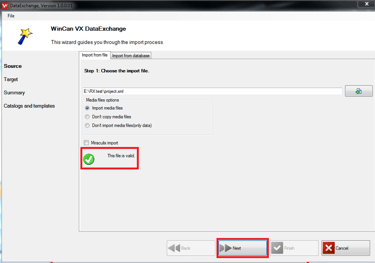
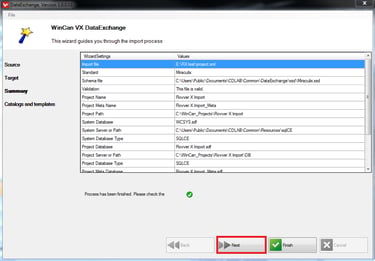
You should now see that the field is valid. Click NEXT to continue. |
|
|
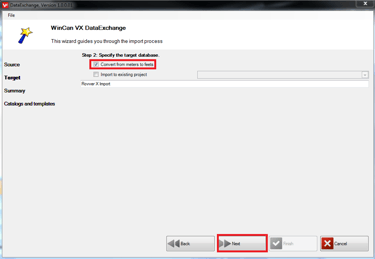
After selecting the project, you will need to specify the target WinCan VX project. This can be a new project (enter a project name in the available field), or you can choose to import into an existing project by checking the corresponding box. When creating a project using feet as the unit of measurement, check the box that prompts conversion of meters to feet. Click NEXT. |
|
|
|
|
|
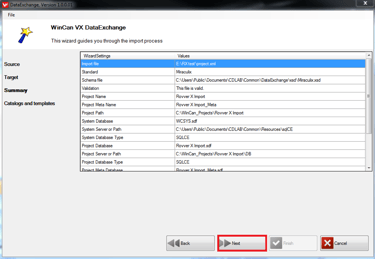
During this process, you may see the progress bar move slowly or stall depending on the size of the project. When this is finished, click NEXT. |
|
|
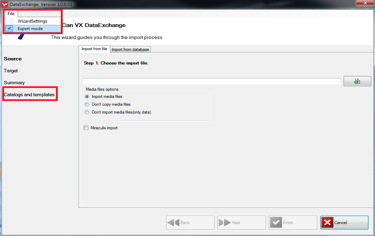
Click NEXT to select your PACP standard. |
|
|
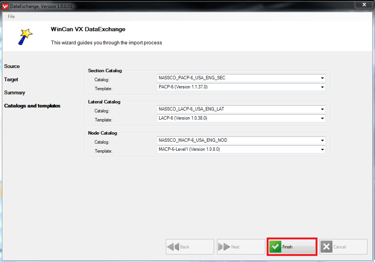
(If you click FINISH instead, the project will import according to the control pendant’s preset PACP standard, typically an older version like 4.) The last step is to select the template you wish to work with. When selecting the catalog, the template will automatically match up. Make sure you select to match with the screen shot below (Currently PACP/LACP/MACP 6). Then click FINISH. |
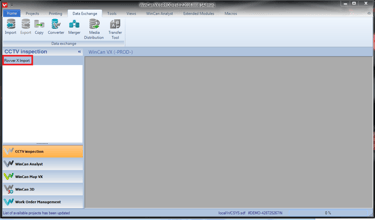 |
The wizard will now close and your project will be added to the CCTV inspection list on the left-hand side of WinCan VX. To open the project, simply click the project name. You have now successfully imported the data collected on the ROVVER X pendant into WinCan VX. |
Also, if you haven't already, sign up to receive Underground Intel. This e-newsletter will keep you in the loop with the latest industry news, white papers, and other valuable information.

